If the construction of any house begins with the foundation, then the manufacture of a greenhouse or greenhouse - with the frame. What types of materials can be used for this, what are their advantages and disadvantages will be discussed in this review.
Advantages and disadvantages of a profile greenhouse
Today, for the manufacture of greenhouse frames, the profile is most often used - metal or less often plastic.
A metal profile is a product that is obtained by pressing, rolling or molding a metal in order to give it the desired shape, for example, a corner, a square, the letters “P”, “T”, “Z”, etc. A plastic profile is a complex and high-tech design consisting of one or more air chambers separated by partitions.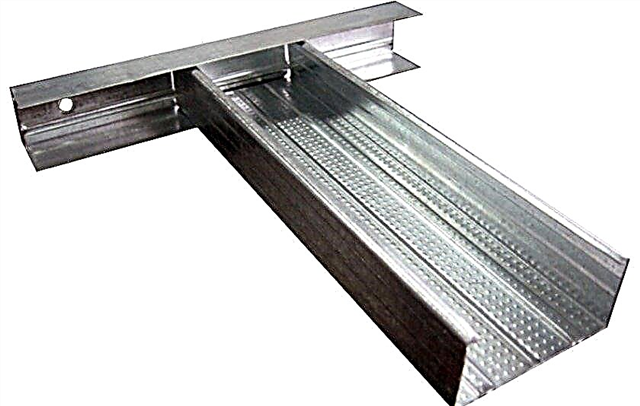
A profile, regardless of what material (metal or plastic) it is made of, has several important advantages over tape types of frame. First of all, such a design has much higher strength, and therefore a product with such a frame has a much greater chance of withstanding strong wind gusts, snowfalls and other natural disasters.
In addition, any profile is very convenient to assemble and you can always choose the material of the exact configuration that is needed for the installation of a particular product (for example, there are ceiling, rails, posts, corners and even the so-called beacon profiles used to align walls), moreover for each of these varieties on the market there are many special components. All this together allows you to assemble almost any product on the principle of the Lego children's designer.
Did you know? The most durable material found in nature is the shell of marine mollusks. It is able to withstand a pressure of 100,000 atmospheres!
As for the shortcomings of the frame from the profile, they, of course, also exist. In particular, such frames, being more durable than sheet ones, are still inferior in reliability to products made of pipes. For this reason, in the manufacture of large stationary greenhouses, such material usually requires additional reinforcement, for example, through the use of a wooden beam around the entire perimeter. In turn, such events complicate the installation of the product and quite significantly increase its cost.
In addition, each specific material that is used to produce the profile has certain disadvantages. So, for the manufacture of a metal frame, steel can be used - carbon, stainless, low alloy, etc. with or without galvanized coating or non-ferrous metals, in particular aluminum - plain or anodized.
As for plastic, different materials can also act in this quality - polypropylene, polyvinyl chloride, etc. Each of these materials has its own characteristics both in terms of strength and durability, and in terms of price, therefore, making a choice, as a rule, always you have to “sacrifice” something or compromise.
Select materials to create the frame
When choosing a material for the manufacture of the frame, you always need to proceed from which particular greenhouse will be built (meaning the size of the structure, its shape, as well as the lining material).
Important! The main purpose of the frame is to ensure the rigidity of the finished product, since none of the possible sheathing materials can withstand any heavy loads.
There may be several options:
- wood;
- metal (profile or pipe);
- plastic (profile or pipe).
Consider the advantages and disadvantages of each type of frame.
Wood
Wooden frames for greenhouses today are used less and less. This material, of course, is highly environmentally friendly and relatively inexpensive, in addition, it is very easy to work with (it does not require any special skills or sophisticated tools). Wood is sold everywhere and allows the manufacture of various structures with very high accuracy.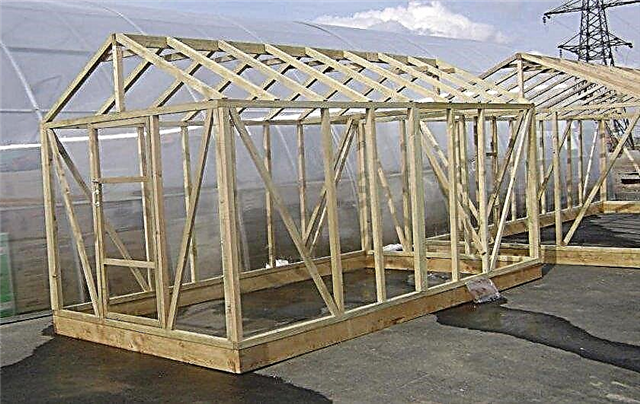
Nevertheless, there are more disadvantages than advantages in building a greenhouse near a tree. The main disadvantage of the material is its fragility. In order for the structure not to rot after the first rainy season, it must be subjected to special treatment. In addition, wooden parts are difficult to clean.
By strength, such designs are also inferior to alternative options, in particular, steel frames. Finally, to obtain a reliable frame, it is necessary to use fairly wide bars or boards, which creates additional shading, which is very undesirable for a greenhouse.
Did you know? The most expensive wood in the world is not red, but ebony. This plant is called grenadil, it grows in Africa, and the cost of one kilogram of such building material is estimated at $ 10,000!
Aluminum profile
Aluminum is a convenient material in all respects, except for its cost. Having decided to make a structure from such metal, you need to be prepared for the fact that it will cost much more than steel.
Another disadvantage of the aluminum profile is its lack of rigidity. So that such a frame does not bend, it usually has to be strengthened with the same wooden beams, the disadvantages of which have already been mentioned.
However, the advantages of aluminum are so obvious that it is this material that many prefer to use in the manufacture of greenhouses.
- In particular, an aluminum profile frame:
- unlike steel, it is not susceptible to corrosion, while the strength of the steel is not inferior to it (additional rigidity is provided by angles and edges that distinguish the profile from linear metal);
- reliable and durable (the aluminum base of the greenhouse, unlike the wooden one, can last for decades);
- does not change shape, does not shrink, does not stretch and does not expand under the influence of different temperatures and changes in humidity;
- environmentally friendly (unlike some polymeric materials, does not emit harmful substances even when exposed to fire);
- lightweight, ergonomic and compact;
- not difficult to process (aluminum can be cut using tools available to almost any host).
Another advantage of the aluminum profile is that it is presented in many different configurations, allowing you to design greenhouses of any kind and shape.

In particular, for the manufacture of such products, such varieties of aluminum profile are used as connecting (for vertical joining of panels), end (for protecting side edges), ridge (fastens the greenhouse wall to the roof), as well as wall, used in cases when One of the sides of the greenhouse is the wall of the house or other capital structure.
Plastic profile
- Plastic is a material that is distinguished by the following characteristics:
- low cost;
- ease of installation and dismantling;
- ease of maintenance;
- resistance to temperature changes and humidity changes;
- low thermal conductivity (very important for a greenhouse);
- durability (does not decay and does not rust).
All these qualities make the polymer a very attractive material for the manufacture of greenhouses. To this end, you can even use a profile for plastic windows, specially designed to hold the glass, while creating high tightness.
However, compared with metal, plastic has its drawbacks. The main one is lightness and instability. Plastic structures need to be heavier, otherwise the greenhouse may collapse due to the high windage. For this reason, in professional greenhouses, the use of a plastic profile is combined with a galvanized metal profile.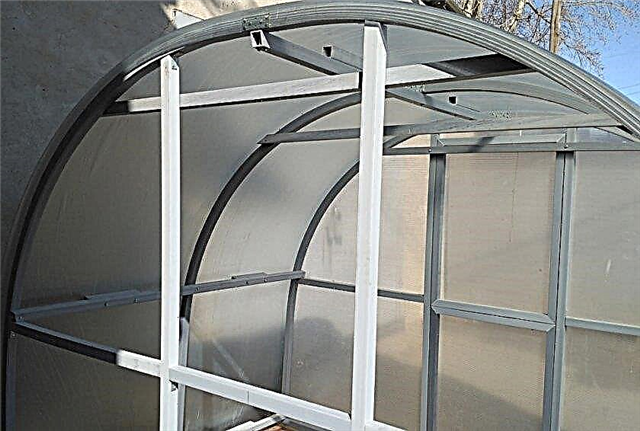
Metal pipes
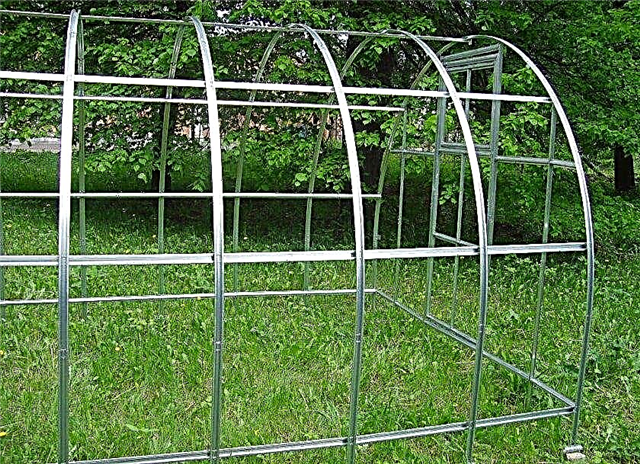
The advantage of the pipe over the profile is that, ceteris paribus, the round section is always stronger than the angular, so the design does not require any additional reinforcements. Another advantage of a metal pipe is its significant weight, which gives the frame additional stability. For this reason, it can even be installed directly on a wooden base without resorting to additional concreting.
However, if the profile frame can be quite easily assembled literally in the "field conditions", then the metal pipes are attached to each other by welding. Therefore, in the absence of special equipment and professional skills, the manufacture of the basis for such a greenhouse must be ordered at a specialized enterprise, which, on the one hand, increases financial costs, and on the other hand, creates serious difficulties in transporting the finished product.
Another indicator by which pipes lose to the profile is their higher cost.
Metal corner
The corner is one of the many varieties of the profile. If the material for its manufacture is not aluminum, but iron or steel, such a product, of course, will be cheaper, but another problem arises.
Important! Iron and steel products are subject to corrosion, so the frame must necessarily include a special protective coating.
To this end, galvanizing or modern polymer spraying can be used, but this significantly increases the cost of the material and in certain cases (for example, for making a small summer greenhouse in a private garden) even makes the material unprofitable.
The way out of this situation can be the primer of the finished frame, but this option is not without drawbacks, since no one guarantees the reliability of such a coating.
PVC pipe
Among the polymeric materials used for the manufacture of greenhouse frames, polyvinyl chloride pipes are much more popular than the plastic profile.
Possessing all the advantages of the latter, PVC pipes have a higher rigidity, due to which they are able to withstand even the significant weight of snowdrifts on the roofs. In addition, such pipes have a huge range of sizes, are sold everywhere and cost literally a penny, while the plastic profile of the desired configuration can be much more difficult to choose.
As for the installation, unlike metal, plastic is equally easy to process regardless of the shape of the cross-section, therefore, from this point of view, the pipe does not lose profile in any way.
How to make a greenhouse with a metal frame yourself
Since it is quite difficult to weld a frame for a greenhouse from a metal pipe, we will consider in detail the technology for manufacturing a greenhouse with a base from a metal profile.
Step-by-step instructions for creating a greenhouse
It is always necessary to start any work with a plan.
In particular, it is necessary:
- determine the size of the future structure;
- choose a suitable place for him on the site;
- draw up a drawing, or at least an approximate scheme of work;
- purchase the necessary materials and tools.
Size calculation
When determining the size of the greenhouse, in addition to the area of its land, as well as the number and type of crops that are planned to be grown under shelter, important factors to consider are:
- If the cultivation of crops will be carried out in several tiers, the length of the structure should be a multiple of the size of the pallet (rack) on which the boxes with seedlings will be installed. The standard dimensions of such pallets are usually 280 x 530 mm, respectively, for the calculation you need to take one of these parameters.
- The larger the total area of the greenhouse, the harder it will be to maintain a constant microclimate inside it.
- The width of the structure should be chosen in such a way that the person inside is comfortable moving and serving the beds on both sides of the passage. If the mentioned size of 530 mm is used for the width of the beds, the minimum width of the greenhouse should be 2 m (although 3 m is considered to be the optimal indicator).
- Too long structures require a stiffer frame, so when making a greenhouse with your own hands for use in a small garden, it is better to focus on a greenhouse up to 6 m long.
- The height of the structure should allow a person to stand inside the greenhouse at full height. Higher designs are needed only when they are used to grow trees or other crops that exceed the height of human growth. In other cases, 1.8–2 m is quite an option.
Choosing and preparing a place for a greenhouse
In order to choose the right place to place the greenhouse, you need to understand the physical principle of operation of this structure.
Important! The main purpose of the greenhouse is the accumulation of sunlight for the purpose of its subsequent conversion into thermal energy, which will evenly heat indoor plants both day and night, when the temperature "overboard" is significantly reduced.
It is due to the evenly distributed heat that the greenhouse crops actively develop. Protection from wind, rain, insect pests, rodents and other unpleasant external factors are also important tasks, but still secondary.
In order for the original goal to be achieved as efficiently as possible, the greenhouse should always be built in the most well-lit area that you can choose. It is also necessary to make sure that the place is not too wet, especially if a wooden frame is used for the construction, so it is better to choose a hill for a greenhouse than a lowland.
And one more standard tip. If the length of the conceived greenhouse will greatly exceed its width, it is recommended to arrange such a structure along the meridian (from north to south) - in this case, all plants will be lit evenly. However, this rule applies to summer greenhouses.
During the construction of the shelter, which will be used all year round, the orientation in latitude (from east to west) shows itself better, since the maximum illumination in this case will be received by the plants at noon, that is, exactly when it is necessary in the conditions of short daylight hours.
If the chosen place is dry enough, all the preparatory work is reduced to thoroughly cleaning it, however, if groundwater is near or waterlogged, before starting work, you need to take care of the drainage system or laying the drainage.
Did you know? In the UK there is the world's largest greenhouse with an area of 22,000 square meters. m. True, the Eden Project (this is the name of this miracle) is not a single structure, but a complex network of hemispheres adjacent to each other.
Selection of materials and preparation of tools
For the manufacture of the greenhouse you will need such materials:
- angular type metal profile for frame assembly (minimum thickness 1.2 mm, optimal 1.5 mm);
- material for shelter;
- wooden slats for the manufacture of the base;
- sand;
- crushed stone;
- ready-made foam concrete supports for the foundation (preferably in the form of a truncated pyramid, but you can use ordinary slabs, cut to size 20x30x60 cm);
- screws or screws;
- nails
- stainless steel bolts and nuts (can be replaced with aluminum rivets).
Standard tool kit:
- a pencil or marker for drawing markings;
- shovel;
- measuring tool;
- building level;
- hammer;
- drill or screwdriver;
- jigsaw;
- angle grinder;
- keys (open-end and socket wrenches);
- scissors for metal.
Video: Assembling a polycarbonate greenhouse and steel profile
We make the base for the frame
There are three main types of foundation for a greenhouse: a wooden frame (strip type), a monolithic concrete base, and an intermediate option is a wooden frame on point concrete supports. The choice depends on many factors, ranging from the appointment of the greenhouse to the financial capabilities of the owner of the site.
The simplest and cheapest option is a tape base, but an expensive aluminum greenhouse on such a foundation will not stand idle for a long time, so it is better to use spot concrete using ready-made blocks.
To execute it:
- Dig four pits around the perimeter of the future building to install supports approximately 45 cm deep.
- Pour a layer of wet sand about 8 cm thick at the bottom of each pit. Tamp the “pillow” well (it is desirable that its thickness be reduced by at least 30%).
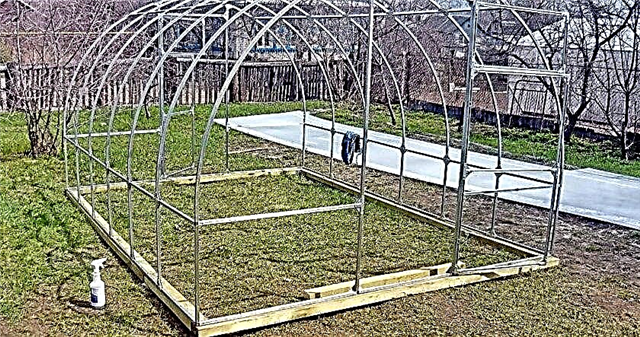
- Using nails, assemble a frame in the form of the base of the future greenhouse with nails and install it on the prepared platform so that the pits for the supports are inside the frame at each of the four bases.
- Install supports in the pit and compactly compact the free area of the pit to the surface with rubble or sand.
Fastening the frame to the base
The assembly of the frame and its fastening to the base are carried out in stages as follows:
- Cut from the corner of the workpiece to the desired size.
- Drill bolt holes at the end of each workpiece.
- Assemble the frame. First, the lower horizontal part is assembled, in which the side walls are sequentially fastened - short and after them - long.
- Using screws, attach to the corner a wooden beam around the perimeter to make the structure heavier.
- Attach the finished frame to the wooden base frame with screws in steps of at least 1 m.
- To increase strength, bolt wooden beams to each wall at a height of 1–1.5 m (depending on the size of the greenhouse). If necessary, it will be possible to subsequently attach to these beams shelves for placing boxes with plants.
- On the front side of the greenhouse, attach a frame for the future door to the base.
Frame cladding
There are three types of material that can be used for cladding a greenhouse:
- polyethylene film;
- glass;
- polycarbonate.
Comparing them with each other, the following can be noted:
| Type of material | Advantages | disadvantages |
| Film |
|
|
| Glass |
|
|
| Polycarbonate |
| high price |
Thus, polycarbonate is the undisputed leader among materials for covering greenhouses. Once you spend on its purchase, you can build on your site a long-lasting greenhouse construction of any size and shape.
Important! Polycarbonate is monolithic and cellular. For the construction of greenhouses, you always need to choose the second option, since it is he who has the necessary parameters of thermal conductivity and sufficient ease to solve the problem.
For greenhouse sheathing with polycarbonate:
- Remove the purchased plastic sheets from the packaging.
- Mark and cut the necessary parts. Pay attention to which side the special layer is located to protect the material from ultraviolet radiation (it is better to purchase polycarbonate with such protection, it can be applied on both sides, but this happens rarely, one-sided protection should be on the outside of the greenhouse).
- Attach the prepared sheets to the frame using the thermal washers supplied with the polycarbonate kit (fragments of the structure should overlap). If such components are missing, you can use ordinary roofing screws.
- Install the doors and windows (vents) with the hinges.
- Seal the seams using a special tape (should be sold complete with polycarbonate).

Thus, building a frame greenhouse on your own site with your own hands is not so difficult. It is only necessary to formulate the problem correctly and determine the budget, after which, depending on these two factors, it remains only to choose the most suitable option for yourself and to implement it step by step.


